
Every late summer, goldenrod blooms along our property and northern Michigan roadsides, signaling that cooler days are coming. Harvesting goldenrod has become one of my favorite seasonal routines — a simple way to slow down, gather something useful, and store a bit of sunshine for the months ahead.
If you’ve been curious about how to harvest goldenrod for tea, salves, or natural dye, this post will show you everything you need to know straight from my baskets and kitchen counter. And to make the most of autumn beyond goldenrod, don’t miss my free Simple Living Fall Bucket List Printable.
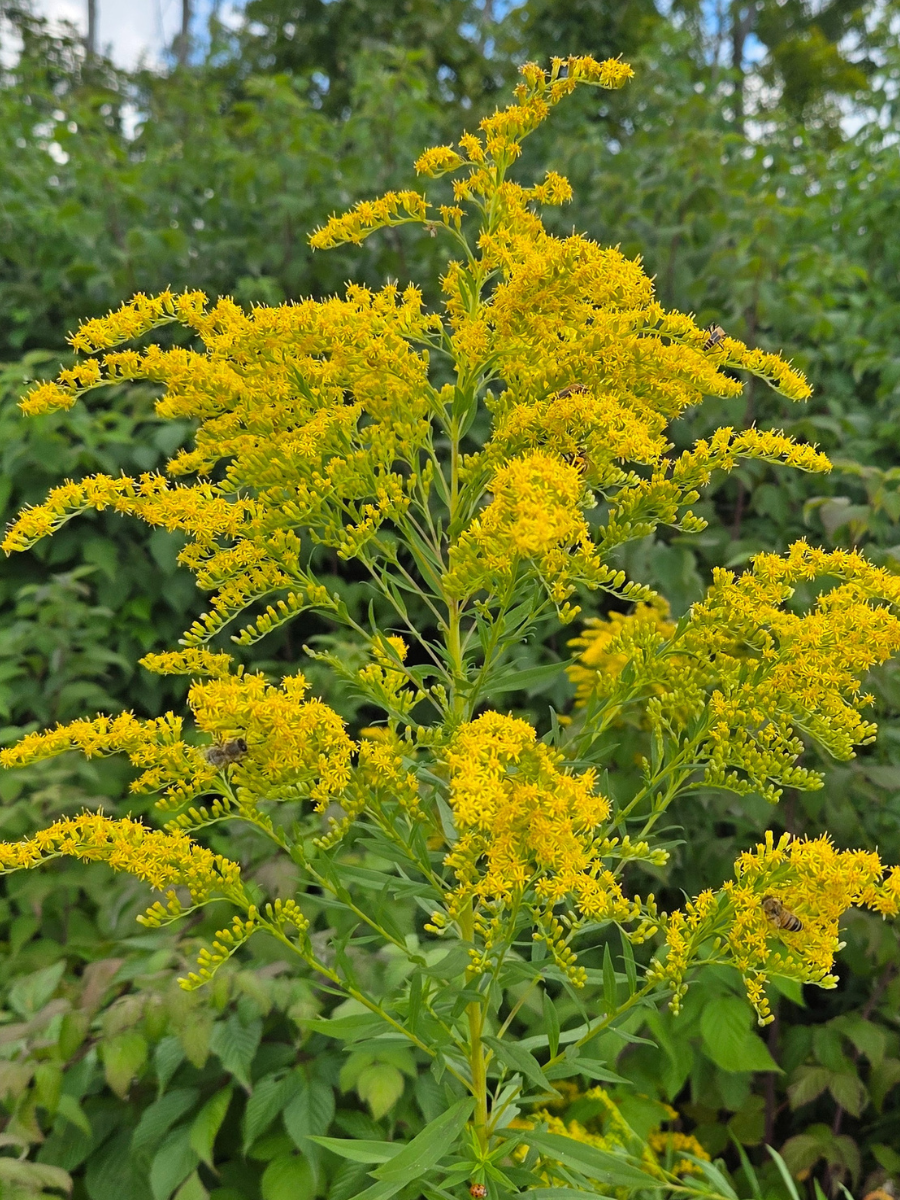
What is Goldenrod
Goldenrod (Solidago species) is that burst of golden-yellow you see along roadsides and meadows in late summer. This hardy perennial is often mistaken for ragweed—the real allergy culprit—but it’s actually insect-pollinated and far less likely to trigger sneezes.
For generations, people have gathered goldenrod for teas, salves, and dyes, valuing its bright blossoms for both beauty and traditional folk uses. To me, it’s not just another “weed,” but a free, abundant plant that brings a little sunshine and nature’s pharmacy into the home each fall.
Why Harvest Goldenrod
There are a few reasons I make space for goldenrod in my fall routines:
- It’s beautiful. Bundles of goldenrod hanging upside down in the mudroom or kitchen bring instant farmhouse charm.
- It keeps you present. Gathering goldenrod makes me slow down and notice the shift in seasons instead of letting it slip by.
- It’s free and abundant. No need to spend money on herbs when goldenrod is growing in meadows, ditches, and sometimes right in your own yard.
- It’s versatile. The blossoms and leaves can be dried for tea, infused into oil for salves, or simmered into a natural yellow dye.

When to Harvest Goldenrod
The best advice is simple: watch the blooms, not the calendar. Goldenrod is at its peak when about one-third to one-half of the tiny yellow flowers on each plume are open, with the rest still in bud. That’s when the plant’s color, scent, and beneficial compounds are at their strongest.
A few quick tips:
- Time of year: Here in northern Michigan, it’s usually late August through mid-September.
- Time of day: Harvest mid-morning on a dry, sunny day after the dew has dried.
- Location: Choose clean areas—avoid roadsides, sprayed fields, or low spots where runoff collects.
What to Harvest
Different parts of goldenrod can be used for different things:
- Flowering tops: Snip the top 6–12 inches of the stem, blossoms and tender leaves included. This is what I dry for tea or oil infusions.
- Leaves only: If you want less floral flavor, just strip a few leaves.
- Whole stems: For natural dyeing, cut full stems so you have enough plant material.
Take what you’ll actually use, and leave plenty behind for the bees and butterflies. They count on goldenrod’s nectar as summer winds down.

Tools and Prep
- A pair of scissors or pruners
- A basket or paper bag (plastic makes it wilt faster)
- Optional gloves if sticky resins bother you
Harvest Goldenrod Responsibly
Goldenrod is an important food source for pollinators this time of year, so I always keep these guidelines in mind:
- Take no more than one-third of a patch.
- Leave plenty of flowers for bees and reseeding.
- Cut stems instead of pulling to protect the roots.
- Change up your spots each season so no patch is overharvested.
That way, goldenrod stays plentiful year after year—for us and for the wildlife.

How I Harvest Goldenrod
Here’s the simple method I follow:
- Scout the patch. Look for healthy stands with bright, fresh blooms.
- Check bloom stage. Skip plants that are browning or going to seed.
- Cut carefully. Snip the top 6–12 inches, cutting just above a leaf node.
- Shake gently. Insects love goldenrod, too—shake them off before you bring it inside.
- Keep it airy. Don’t overfill your basket. A little airflow keeps the stems from bruising.

How to Dry and Store Goldenrod
Drying in Bundles
Tie small bundles with string or rubber bands and hang them upside down in a warm, airy space out of direct sun. A porch or mudroom works perfectly.
Drying on Screens
If space is tight, spread the flowering tops loosely on mesh screens or use dehydrator trays set to the lowest herb setting.
Storage Tips
Once dry—crispy, not leathery—strip the blossoms and leaves from the stems. Store them in airtight glass jars, labeled with the date and spot you gathered them, and tuck the jars in a cool, dark cupboard. Properly dried goldenrod will keep its bright yellow and mild aroma for up to a year.
Ways to Use Your Harvest
Here are some of the ways I enjoy goldenrod long after the fields fade:
- Herbal tea: Steep 1–2 teaspoons of dried blossoms and leaves in hot water for about 10 minutes. If you’re new to making your own teas, check out my guide on how to brew herbal tea at home.
- Infused oil or salve: Cover dried tops with olive oil, let them sit for 4–6 weeks, then strain and mix with beeswax for a skin salve. For more step-by-step ideas, visit my DIY & Handmade page, where you’ll find tutorials like how to make yarrow infused oil and how to make calendula salve with shea butter.
- Tincture: Pack a jar halfway with fresh flowering tops, cover with high-proof alcohol, and steep for 4–6 weeks.
- Natural dye: Simmer fresh or dried stems in water with a mordant like alum to dye wool or cotton a sunny yellow.

FAQ
Bringing It All Together
Harvesting goldenrod isn’t just about picking an herb—it’s a way to move with the season. Those golden plumes along my property tell me it’s time to wrap up the garden, finish preserving, and enjoy the last warm days before fall. To make those seasonal tasks easier, my Fall Homesteading Projects & Tasks Printable helps you stay organized with all your autumn chores in one place.
By cutting at the right stage, choosing clean spots, and drying with care, you’ll have jars of golden blossoms ready for tea, oil, or dye all winter long—a simple tradition that keeps a little bit of summer on your shelf.


